Clawbot Installation Guide | Complete Setup for Windows, Mac & Chrome [2026]
![Clawbot Installation Guide | Complete Setup for Windows, Mac & Chrome [2026]](/images/blog/clawbot_moltbot_openclaw/clawbot-installation-guide-hero.webp)
Clawbot Installation Guide | Complete Setup for Windows, Mac & Chrome [2026]
Before You Install: System Requirements and Considerations
Installing Clawbot takes only 5 minutes. But before you begin, make sure your device meets the minimum requirements so you don't run into issues after installation.
Want to learn about everything Clawbot can do? Check out What Is Clawbot? The Complete Guide to understand the product positioning and core features before installing.
Minimum Hardware Requirements
| Item | Minimum Requirement | Recommended Specs |
|---|---|---|
| CPU | Dual-core 2.0 GHz | Quad-core 2.5 GHz or higher |
| Memory | 4 GB RAM | 8 GB RAM (16 GB recommended when using Browser Relay) |
| Storage | 500 MB | 2 GB (including logs and screenshot storage) |
| Network | Stable internet connection | Wired connection or 5 GHz Wi-Fi |
Browser Relay runs browser instances in the background, with each instance consuming approximately 200-500 MB of memory. If you need to run multiple tasks simultaneously, the more memory the better.
Supported Operating System Versions
- Windows: Windows 10 (version 1903 or later) / Windows 11
- macOS: macOS 12 Monterey or later (supports Intel / M1 / M2 / M3)
- Chrome Extension: Chrome browser version 120 or later
- Linux: Ubuntu 20.04+ / Debian 11+ (community supported, not officially prioritized)
Windows Installation Steps
Download and Install
Step 1: Download from the Official Website
Go to the Clawbot website (clawbot.io) and click the "Download for Windows" button to download the .exe installer.
The file is approximately 150 MB, and download time depends on your internet speed.
Step 2: Run the Installer
Double-click the downloaded .exe file and follow these steps:
- Accept the license agreement
- Choose the installation path (the default path
C:\Program Files\Clawbotis recommended) - Check "Create desktop shortcut"
- Click "Install" to begin installation
The installation process takes about 1-2 minutes.
Step 3: Complete the Installation
After installation is complete, check "Launch Clawbot" to start it immediately, or open it later from the desktop shortcut.
Initial Setup and Launch
The first time you open Clawbot, you'll be guided through the initial setup wizard:
- Create an account: Register with your email, or sign in with a Google / GitHub account
- Choose a plan: Free or paid (you can start with the free plan to try it out)
- Connect your browser: The system will automatically detect your installed Chrome; click "Connect" to complete the connection
- Enter the Dashboard: Setup is complete, and you'll see the Dashboard home screen
Common Installation Troubleshooting
Issue 1: Windows Defender blocks the installer
This is the most common issue. Windows Defender may flag Clawbot as coming from an "unknown publisher."
Solution:
- Click "More info" then "Run anyway"
- Or temporarily disable real-time protection and re-enable it after installation
Issue 2: .NET Runtime version mismatch
Clawbot requires .NET 6.0 or later. If your system indicates a missing Runtime:
- Go to the Microsoft website to download .NET 6.0 Runtime
- After installation, re-run the Clawbot installer
Issue 3: Insufficient permissions during installation
Right-click the installer and select "Run as administrator."
macOS Installation Steps
Download and Install
Step 1: Download the .dmg file
Download the macOS .dmg installer from the official website.
Note: Intel Macs and Apple Silicon (M1/M2/M3) use different installers. Make sure to check your chip type by clicking the Apple icon in the top-left corner and selecting "About This Mac."
Step 2: Install to Applications
- Double-click the
.dmgfile to mount the disk image - Drag the Clawbot icon into the Applications folder
- Wait for the copy to complete
- Eject the disk image
Step 3: First Launch
Open Clawbot from the Applications folder or Launchpad.
Security Permission Settings
macOS has stricter security controls for third-party applications, so additional settings are needed on the first launch.
Gatekeeper Security Prompt
If you see a "developer cannot be verified" message on first launch:
- Open "System Settings" then "Privacy & Security"
- Find the Clawbot prompt at the bottom and click "Open Anyway"
- Enter your password to confirm
Accessibility Permission
Clawbot's Browser Relay requires Accessibility permission to control the browser:
- Open "System Settings" then "Privacy & Security" then "Accessibility"
- Click the lock icon to unlock
- Find Clawbot in the list and check the box to allow
Common Installation Troubleshooting
Issue 1: "Clawbot is damaged and can't be opened"
This is usually a Gatekeeper issue, not actual file corruption.
Open Terminal and enter:
xattr -cr /Applications/Clawbot.app
Then reopen Clawbot.
Issue 2: M1/M2 compatibility issues
If you accidentally downloaded the Intel version, it will run through Rosetta 2 on an Apple Silicon Mac with reduced performance. It's recommended to re-download the ARM version.
To check: In "Activity Monitor," look at the "Kind" column for Clawbot. If it shows "Intel," you've installed the wrong version.
Having trouble during installation? Book a free consultation and let our experts help you resolve it quickly.
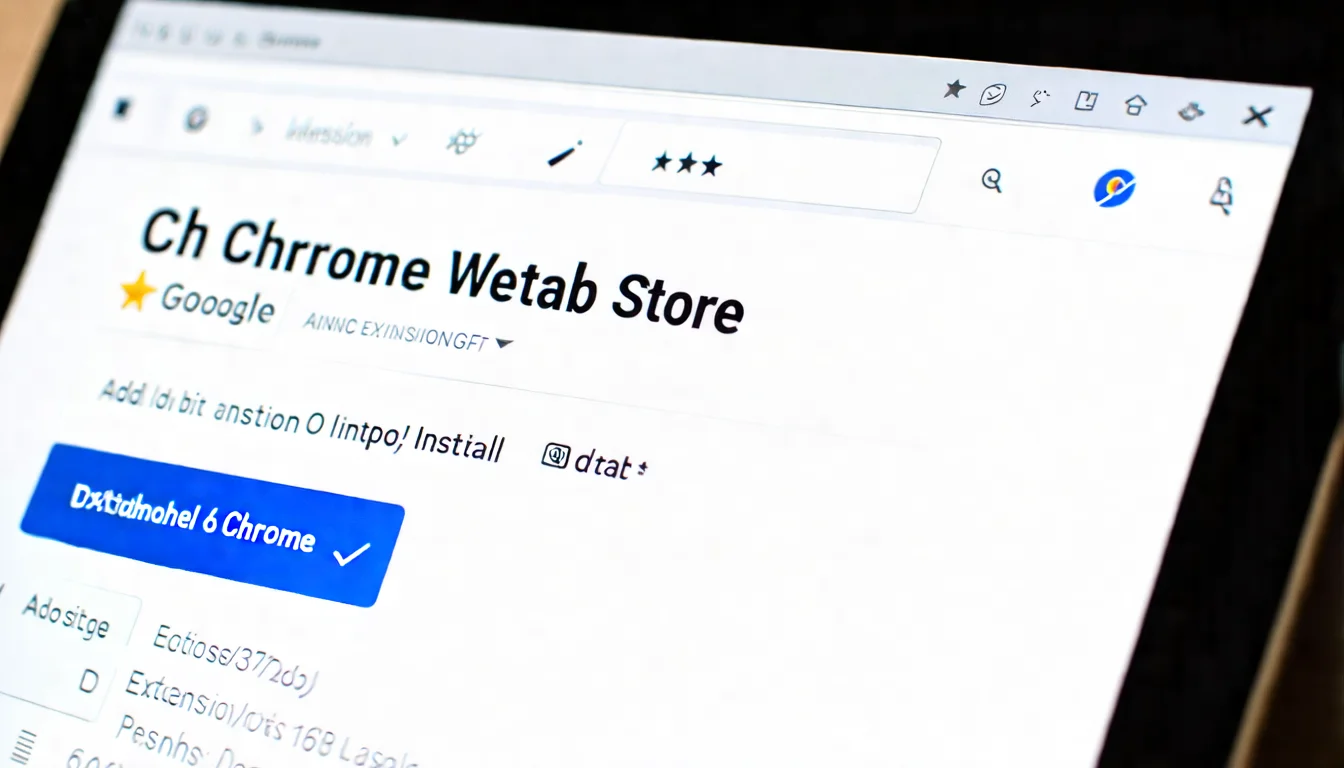
Chrome Extension Installation
Install from the Chrome Web Store
If you don't need the full desktop version and just want to use the basic features in your browser, the Chrome extension is the lightest option.
Installation steps:
- Open Chrome and go to the Chrome Web Store
- Search for "Clawbot"
- Click "Add to Chrome"
- Confirm the permissions to complete installation
The extension will appear in the toolbar at the top-right corner of your browser.
Extension vs. Desktop Version Comparison:
| Feature | Chrome Extension | Desktop Version |
|---|---|---|
| Browser Relay | Limited (current browser only) | Full (remote browser instances) |
| Dashboard | Simplified version | Full version |
| Scheduled Tasks | Not supported | Supported |
| API Access | Not supported | Supported |
| N8N Integration | Not supported | Supported |
| Best For | Light use, individuals | Teams, advanced needs |
Extension Settings
Basic settings after installation:
- Pin to toolbar: Click the puzzle icon in the Chrome toolbar, find Clawbot, and click the pin icon
- Sign in: Click the extension icon and sign in with your account
- Set default behavior: Choose the default action when clicking the extension (quick capture / open panel)
- Desktop sync: If you have the desktop version installed, the extension can sync tasks and records with it
Getting Started with the Dashboard
Interface Overview
After installation and signing in, you'll enter the Clawbot Dashboard. The screen is divided into four main areas:
- Left sidebar: Task list, templates, settings
- Center area: Detailed information for the currently selected task
- Top-right corner: Notifications, account settings, usage statistics
- Bottom status bar: Real-time status of running tasks
Creating Your First Automation Task
Follow this example to create your first task in 2 minutes: automatically open a specific webpage and take a screenshot.
Step 1: Click "+ New Task" in the top-left corner
Step 2: Select the task type then "Browser Relay"
Step 3: Fill in the task settings
- Name: "Daily Webpage Screenshot"
- Target URL:
https://example.com - Action: "Screenshot"
- Output path: Choose where to save the screenshot
Step 4: Click "Run" to execute
Within a few seconds, you'll find the screenshot file at the specified path. The task execution log will appear in the center area of the Dashboard.
Basic Settings and Preferences
In the Dashboard's "Settings," you should consider adjusting the following:
- Language: Select your preferred language (if available)
- Notifications: Enable task failure notifications (Email or Desktop notifications)
- Auto-update: Recommended to enable to ensure you're always on the latest version
- Scheduling: Set up automatic execution frequency for tasks (hourly / daily / weekly)

Want to Build Enterprise Automation Workflows with Clawbot?
Installation is just the first step. The real value lies in designing automation workflows tailored to your business.
How CloudInsight Can Help You
- Automation needs analysis: Identify the business processes best suited for AI automation
- Tool selection guidance: Find the optimal combination of Clawbot with N8N, Zapier, and other tools
- Implementation planning: A complete roadmap from POC to production deployment
Book a Free AI Implementation Consultation
Advanced Settings and Code Integration
Clawbot Code Basics
Beyond the visual Dashboard interface, Clawbot also offers a Code mode that lets you precisely control every step with code.
Code mode is ideal for scenarios requiring complex logic, such as conditional branching, loops, and variable handling.
Basic syntax example:
// Open a webpage and extract the title
const page = await clawbot.newPage();
await page.goto('https://example.com');
const title = await page.title();
console.log('Page title:', title);

// Extract multiple data items
const items = await page.$$eval('.product-item', elements =>
  elements.map(el => ({
    name: el.querySelector('.name').textContent,
    price: el.querySelector('.price').textContent
  }))
);
Common commands:
clawbot.newPage()-- Open a new pagepage.goto(url)-- Navigate to a specified URLpage.click(selector)-- Click an elementpage.type(selector, text)-- Type textpage.screenshot()-- Take a screenshotpage.waitForSelector(selector)-- Wait for an element to appear
API Integration Basics
Clawbot provides a REST API that lets you trigger and manage tasks from external systems.
Obtaining Your API Key: Dashboard then "Settings" then "API Keys" then "Generate New Key"
Basic Request Example (cURL):
curl -X POST https://api.clawbot.io/v1/tasks \
  -H "Authorization: Bearer YOUR_API_KEY" \
  -H "Content-Type: application/json" \
  -d '{
    "name": "Quick Screenshot",
    "type": "browser_relay",
    "target_url": "https://example.com",
    "actions": [{"type": "screenshot"}]
  }'
For advanced API development, refer to the Clawbot Developer Guide, which includes a complete list of endpoints, authentication mechanisms, and code examples.
Clawbot Installation FAQ
What Should I Do If the Installation Fails?
Top 3 failure causes and solutions:
| Rank | Cause | Solution |
|---|---|---|
| 1 | Antivirus software blocking | Temporarily disable or add to whitelist |
| 2 | Outdated OS version | Update to the minimum supported version |
| 3 | Insufficient storage space | Free up at least 500 MB of space |
If you've tried all of the above and still can't install, report the issue on the Clawbot GitHub Issues page with a screenshot of the error message.
Do I Need to Reinstall When Upgrading from OpenClaw / MoltBot?
No. If you previously installed OpenClaw or MoltBot, updating to the latest version will automatically transition it to Clawbot.
Upgrade steps:
- Open your existing OpenClaw / MoltBot application
- Check for updates (you'll usually be prompted automatically)
- Click "Update" and wait for it to complete
All your previously created tasks, settings, and API Keys will be preserved -- no reconfiguration needed.
Can I Use It on Multiple Devices Simultaneously?
Yes, but it depends on your plan:
- Free plan: 1 device at a time
- Paid plan: Multiple devices simultaneously (depending on the plan tier)
All devices sign in with the same account, and tasks and records sync via the cloud.
After installation, try the Clawbot AI Agent Automation Tutorial to learn how to build practical automation workflows using AI Agents and Browser Relay.

Recommended Learning Path After Installation
The Clawbot installation process is straightforward across all three platforms. The desktop version on Windows and macOS gives you access to the full feature set, while the Chrome extension is ideal for lightweight use.
After installation, here's the recommended learning path:
- Start by creating a simple task in the Dashboard to get familiar with the interface
- Follow the AI Agent Automation Tutorial to master Browser Relay and N8N integration
- Advanced developers can refer to the Developer Guide for API and GitHub resources
For a complete feature overview, see the Clawbot Complete Feature Guide.
Free Consultation: Team Deployment and System Integration
If you are:
- Considering rolling out Clawbot across your team
- Looking for multi-device deployment guidance
- Wanting to integrate Clawbot into your existing systems
Book a free consultation, and we'll get back to you within 24 hours. All consultations are completely confidential with no sales pressure.
References
- Clawbot Official Documentation, "Installation Guide" (2026)
- Clawbot Official Documentation, "Dashboard User Manual" (2026)
- Apple Developer Documentation, "Notarization for macOS Apps" (2025)
- Microsoft, ".NET 6.0 Runtime Download" (2025)
- Chrome Web Store Developer Documentation (2026)
Need Professional Cloud Advice?
Whether you're evaluating cloud platforms, optimizing existing architecture, or looking for cost-saving solutions, we can help
Book Free ConsultationRelated Articles
Clawbot Developer Guide | GitHub Open Source Project, API Docs & Community Resources
The complete Clawbot developer guide! A deep dive into the GitHub open source project structure, REST API documentation, local development environment setup, and how to migrate from the legacy MoltBot / OpenClaw repos. Includes community contribution guidelines and FAQs.
AI AutomationWhat Is Clawbot? The Complete OpenClaw / MoltBot Guide [2026 Features, Installation, Review]
What is Clawbot (formerly OpenClaw / MoltBot)? A comprehensive breakdown of this AI automation tool's core features, Browser Relay, Dashboard operations, N8N integration, and Windows / Mac / Chrome platform support. Includes comparison tables and FAQs.
AI AutomationHow to Use Clawbot AI Agent: Workflow Automation Tutorial [N8N Integration]
How does Clawbot's AI Agent mode work? A complete guide covering Browser Relay browser automation, Antigravity advanced features, and step-by-step Clawbot x N8N integration with real-world examples. Includes enterprise adoption considerations.